
Tumbling Stones
(We receive a small commission if you purchase through the links below at no cost to you.)
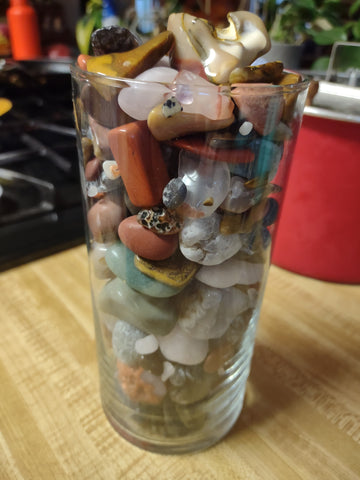
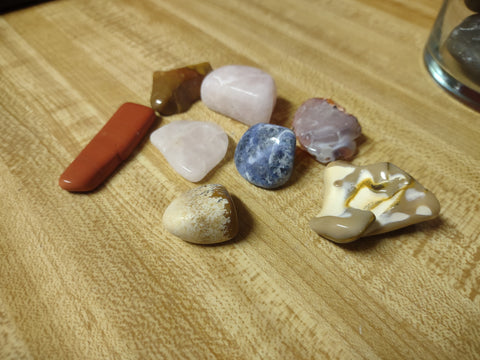
Rocko and I took up rock tumbling as a pandemic project. Time passes, the tumbler rumbles, and we have these smooth shiny rocks. We head out on hikes, rockhounding, and tumble the rocks we find. He's learning about patience, minerals, and mechanical weathering. Joy just loves the semiprecious stones. The nicest ones she calls "pickles," which is also her favorite food, so we assume that's a compliment.
It started with this hobby tumbler by National Geographic:
National Geographic Rock Tumbler
We had it running in the garage 24/7 for months. One day it stopped working, but was still within the two year warranty. We reached out to National Geographic (help@natgeotoys.com) and they immediately fixed the issue. All the stars for their customer service - literally stellar.
We also purchased their refill grit media (60, 150, 600, and 1000 silicon carbide):
National Geographic Refill Grit
The tumbler is not quiet; it sounds like our washing machine when it's running. I can hear it from our driveway. However, it has a rubber drum which is quieter than a plastic one on other tumblers. I would not be able to tolerate the noise if it were inside our home.
Media changes can be messy. The slurry that forms from the water, grit media, and bits of stone can form a type of cement. I don't want that in our garden, so I dump it into an old planter. Never dump it down your sink or drain unless you really want to pay a plumber.
Be sure to fully wash your drum and stones between media changes, or you might not get the shine you're hoping for. Other blogs say that a better grit media will get better results, but we've been very pleased with the National Geographic grit. Perhaps if this website takes off, we can afford some fancier grit and can let you know how it compares.
Further adventures in tumbling:
First we followed advice from a YouTube expert
Then we experimented on our own...
Until we came up with our tumbling recipe based on our trials and advice from others!
Step 1
- Fill your barrel ~75% with rocks of the same hardness (best when they're all the same kind of stone).
- Add a bunch of grit (National Geographic's 60 silicon carbide or Rock Shed's 60/90) - we use 1 tablespoon per pound of rough.
- Fill with water to the top of the rocks.
- Run for three days in the National Geographic tumbler, speed 1.
Step 1.5
- Open the tumbler and feel the slurry. If it's still gritty, keep using it. If it's silky smooth (and it always is for us at this point), then it's no longer effective. Dump it (not down your drain).
- Wash and check your stones. We have a colander propped over a five gallon bucket and use a watering can to rinse them.
- Are they the shape you want them? Do they have weird cracks you don't like? If you like them, move them on to the next step. If you don't like them, put them through Step 1 again. If the tumbler needs more stones to be ~75% full, then you can add more of the same hardness or some ceramic media.
Step 2
- Fill the tumbler ~75% full with the stones from Step 1. If you need help to get it to that level, add ceramic media.
- Use one tablespoon per pound of rock of National Geographic's 150 silicon carbide or Rock Shed's 120/220 grit.
- Fill with water to the top of the rocks.
- Run for 6 days in the National Geographic tumbler at speed 1.
- When done, check the slurry for grittiness. It should be smooth. Dump it and rinse the stones and ceramic media. Make sure to rinse the tumbler well and its lid.
Step 3
- Repeat all of Step 2 but with these modifications: use the next finer grit: the 600 silicon carbide or Rock Shed's 500 aluminum oxide.
- Run for 7 days at speed 1 in the National Geographic tumbler.
Step 4
- Repeat but with these modifications: use the next finer grit: the 1200 silicon carbide from National Geographic or Rock Shed's Aluminum oxide polish.
- Run for 8 days at speed 1 in the National Geographic tumbler.
Step 5
- Put rocks and their ceramic media through a few hours of burnishing. Add a couple tablespoons of borax and water to the top of the stones and let it spin at speed 1.
Step 6
- Move to a slower tumbler. We use the cheap double barrel tumbler from Harbor Freight. Because the barrel is slightly smaller, you may not need to use all of your ceramic media. However, try to keep it at 75% full.
- Add polish from Polly Plastics final polish 1200 fine aluminum oxide.
- Add water to the top of the rocks and let it tumble for at least a week.
Step 7
- When you like the final product, you can rub a little mineral oil on it, then wipe it away with a towel. It should be very shiny!
Notes
- Quartzes seem to get "bruised" in the National Geographic tumbler. You might consider shifting them to a slower tumbler at Step 4.
- When should you move past Step 1? When you feel like there is a good balance between a shape you like and before you've worn the stone away to nothing. Some people use other tools to break off bits they don't like. Personally, I like the imperfections as they add character and interest. To each their own!
Repairing
We've done some repairs! It's not that hard. Check out instructions and sources of replacement parts here: What we've learned so far.
History
Rock tumbling and polishing is a fascinating hobby that has been enjoyed by people for centuries. The process involves tumbling rough rocks in a machine with progressively finer grit until they are polished and shiny.
Historically, rock tumbling and polishing was used for practical purposes such as smoothing and shaping stones for construction, jewelry-making, and tools. Ancient civilizations like the Egyptians, Greeks, and Romans used tumbling and polishing to create beautiful decorative pieces and mosaics.
In the modern age, rock tumbling has become a popular hobby for both adults and children. People enjoy collecting rough stones and transforming them into smooth, colorful, and beautiful pieces of art. Tumbled stones are used in a variety of ways, including jewelry-making, home decor, and as a therapeutic tool.
The process of rock tumbling involves several stages, including rough grinding, fine grinding, pre-polishing, and polishing. The rough rocks are placed in a tumbler with abrasive grit and water, which wears away the rough edges and smooths the surface of the rocks. As the process continues, the grit is replaced with progressively finer grit until the rocks are polished to a high shine.
Rock tumbling is a great way to spend time with family and friends, and it's a fun way to learn about geology and the natural world. Plus, the end results are truly beautiful and can be used in a variety of creative ways.
In short, rock tumbling and polishing has a rich history and continues to be a beloved hobby for people of all ages. It's a great way to explore the natural world and create something beautiful from rough, raw materials.